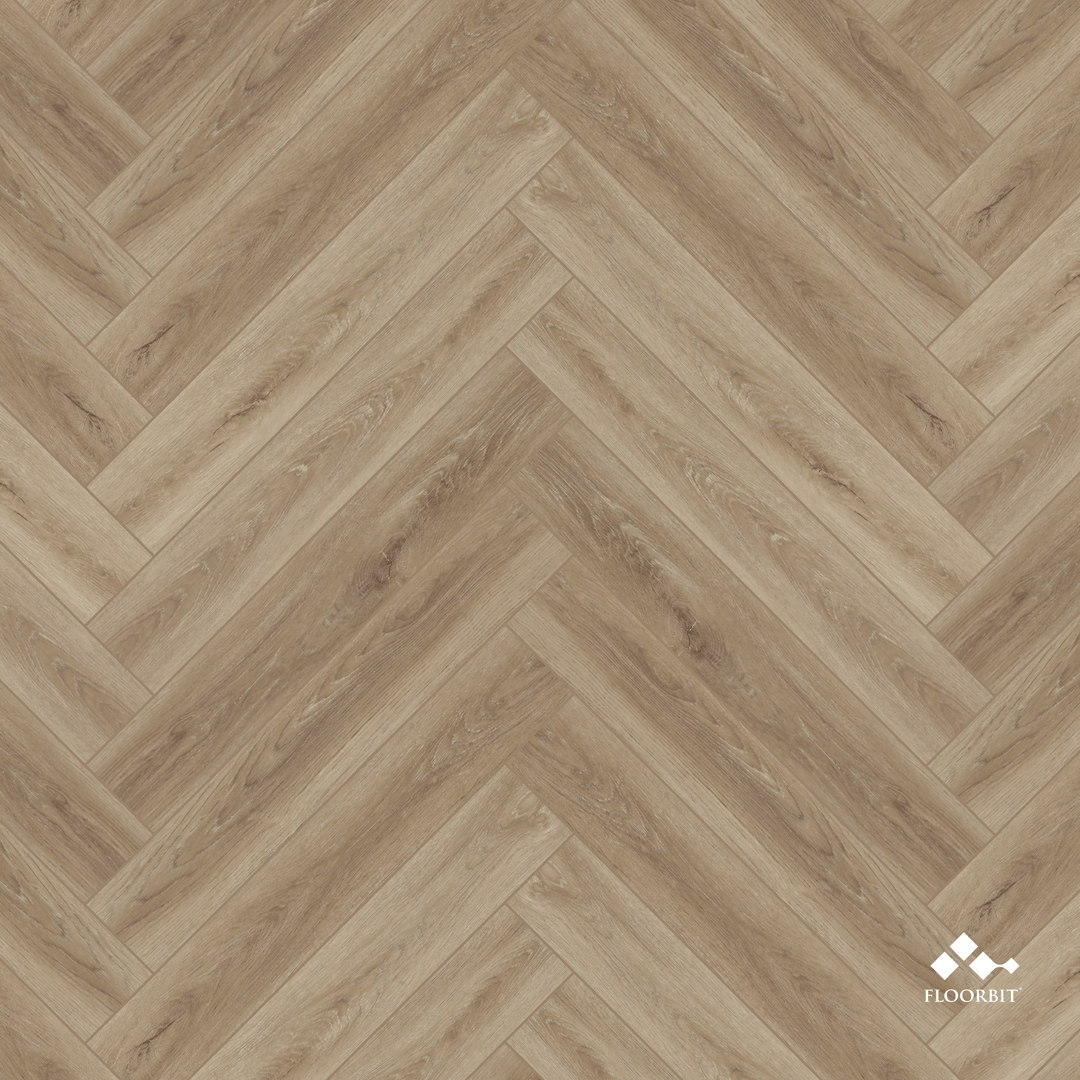
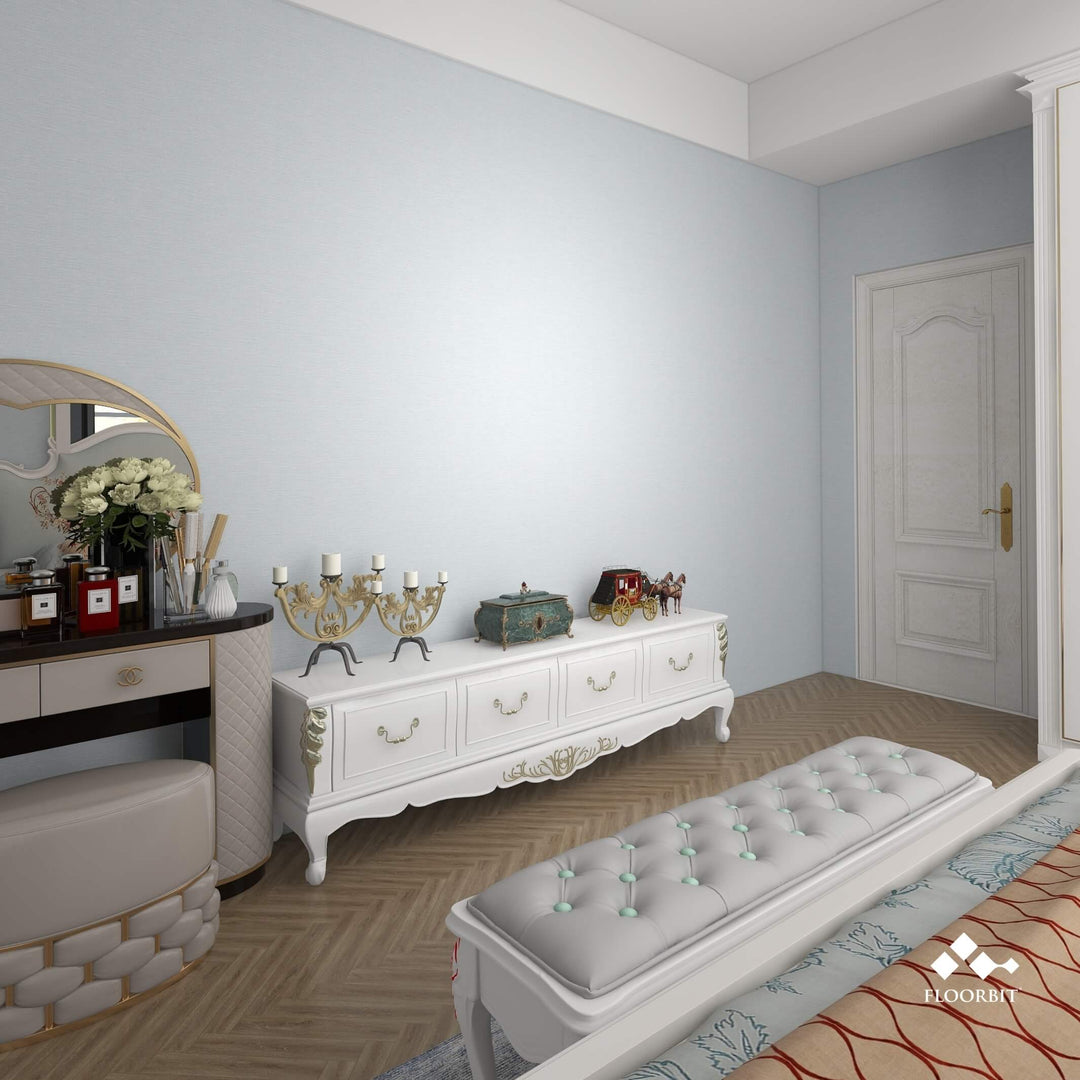
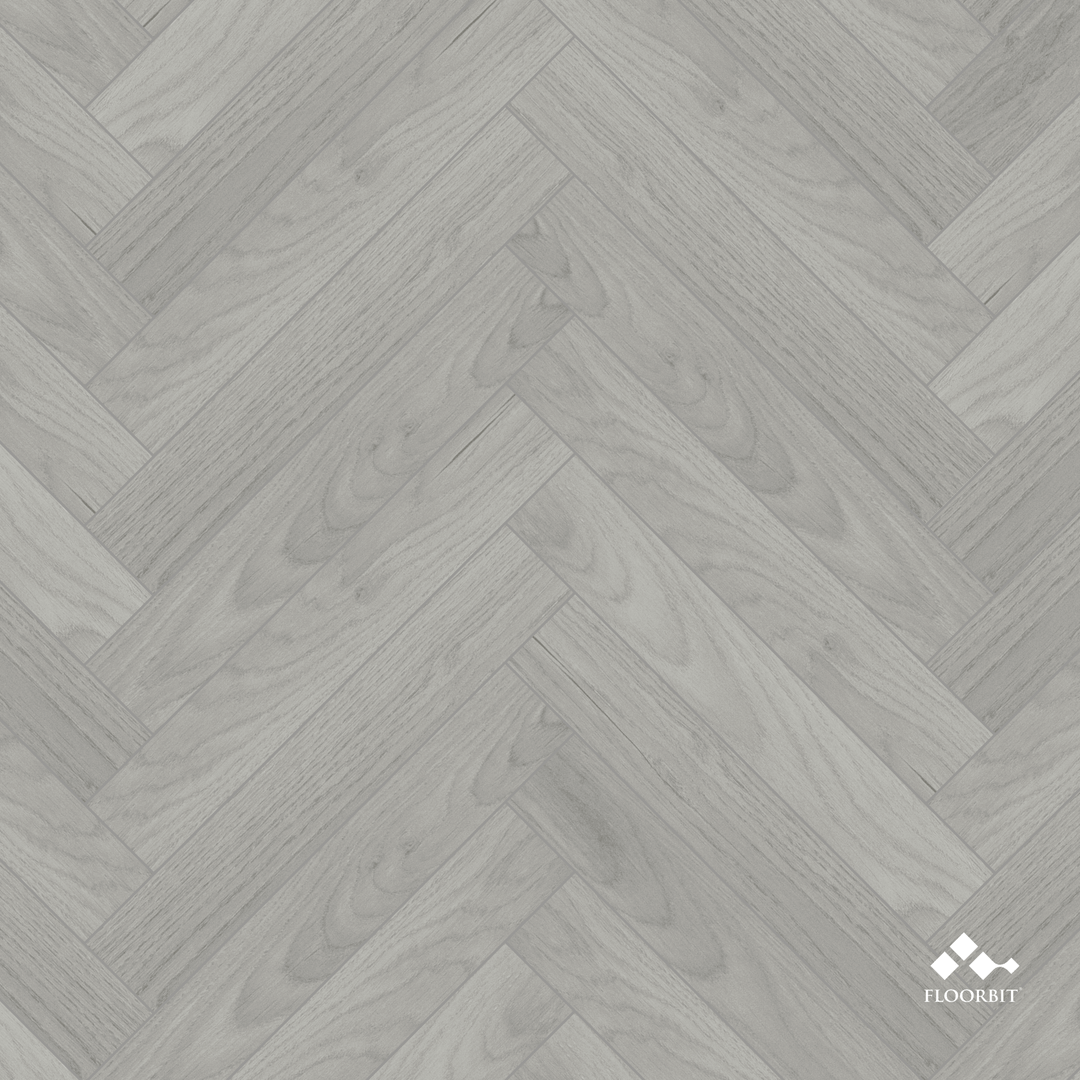
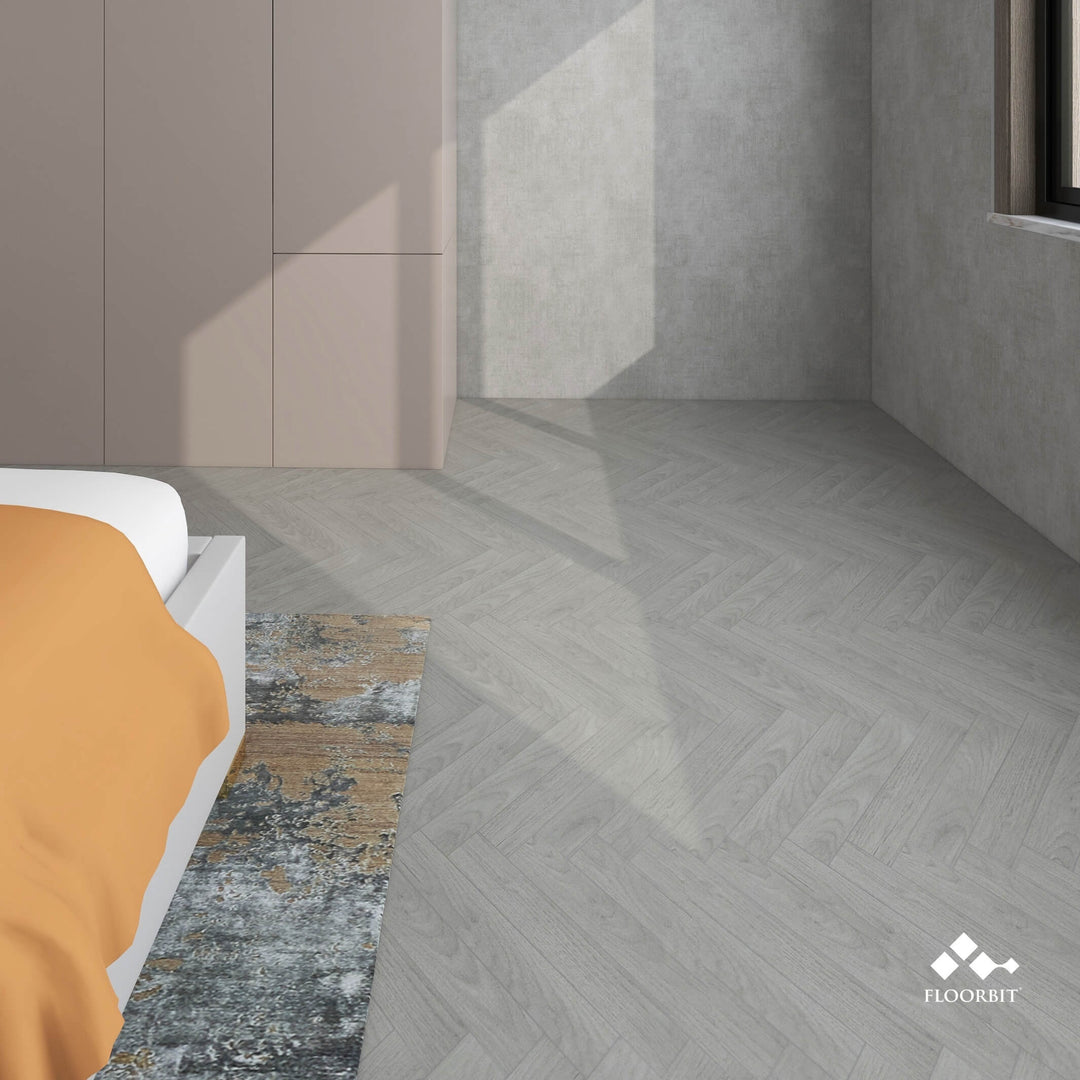
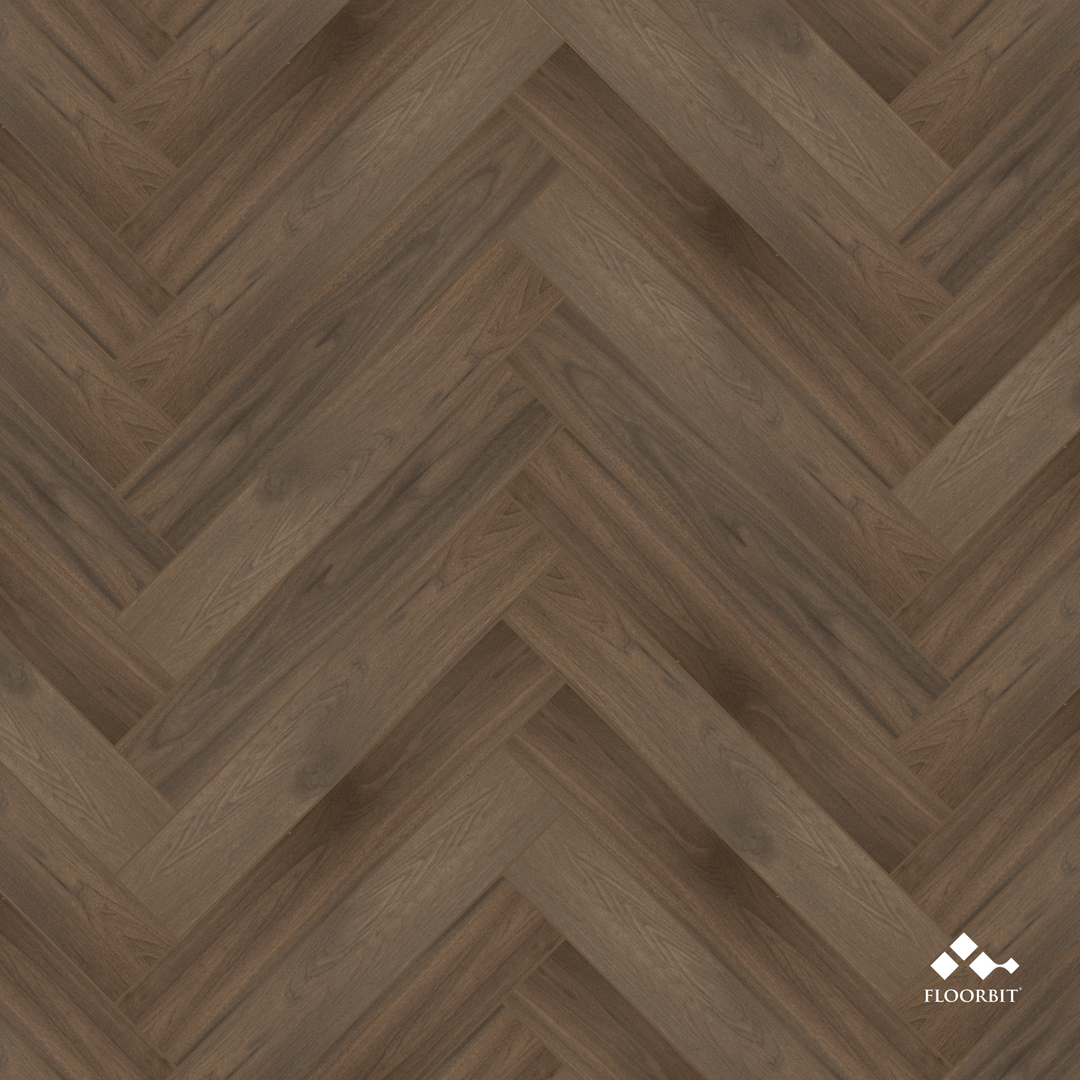
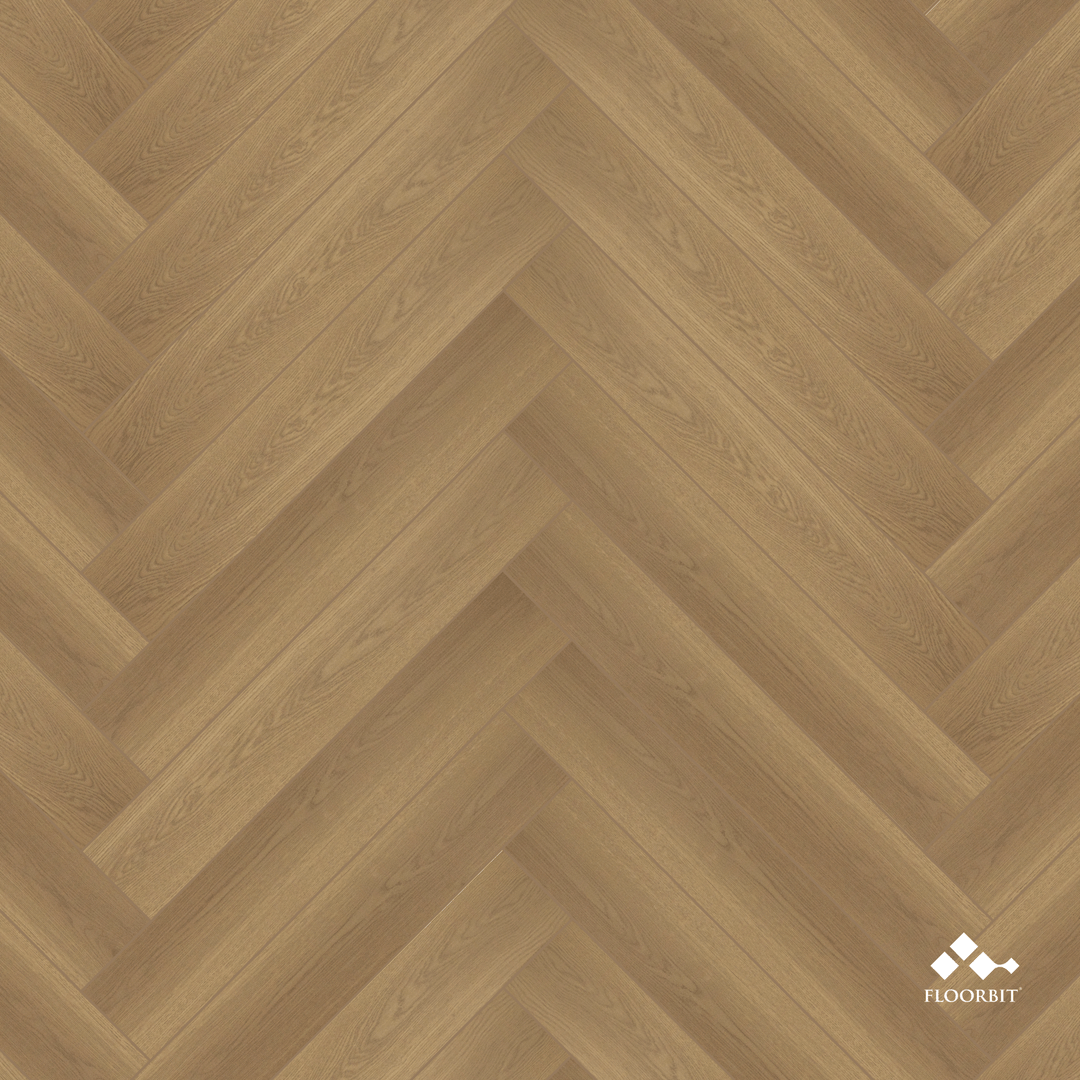

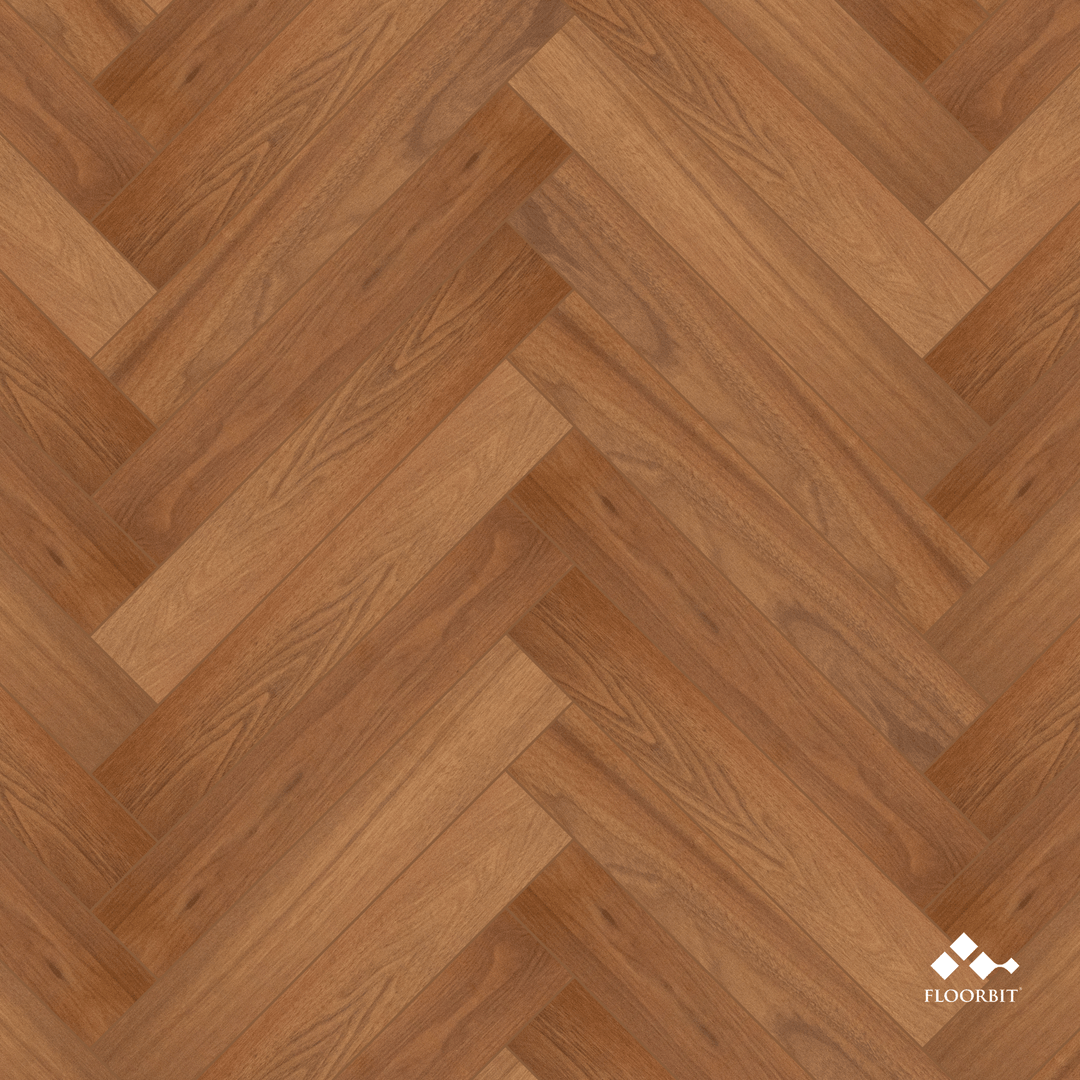


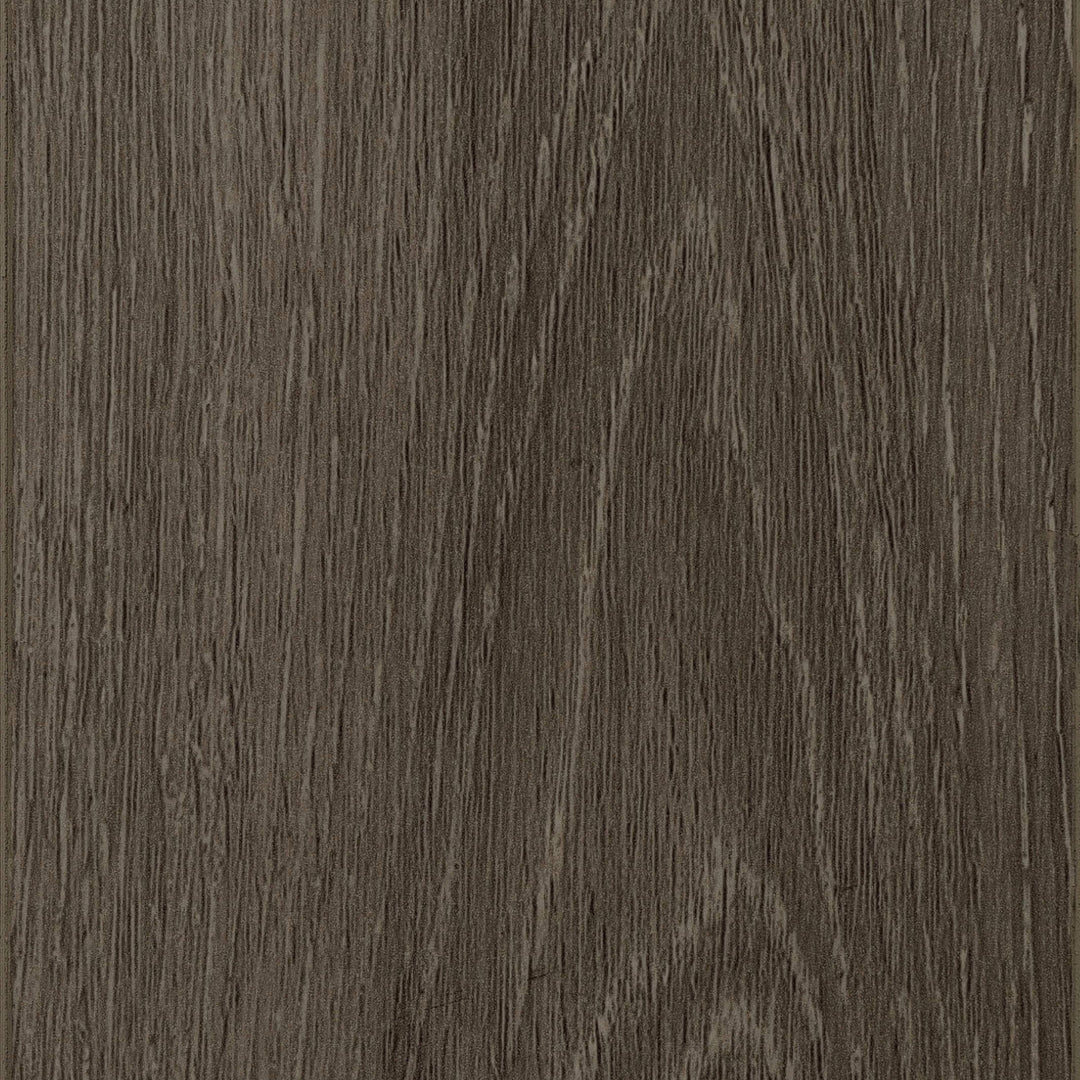
Herringbone waterproof laminate with real wood grain.
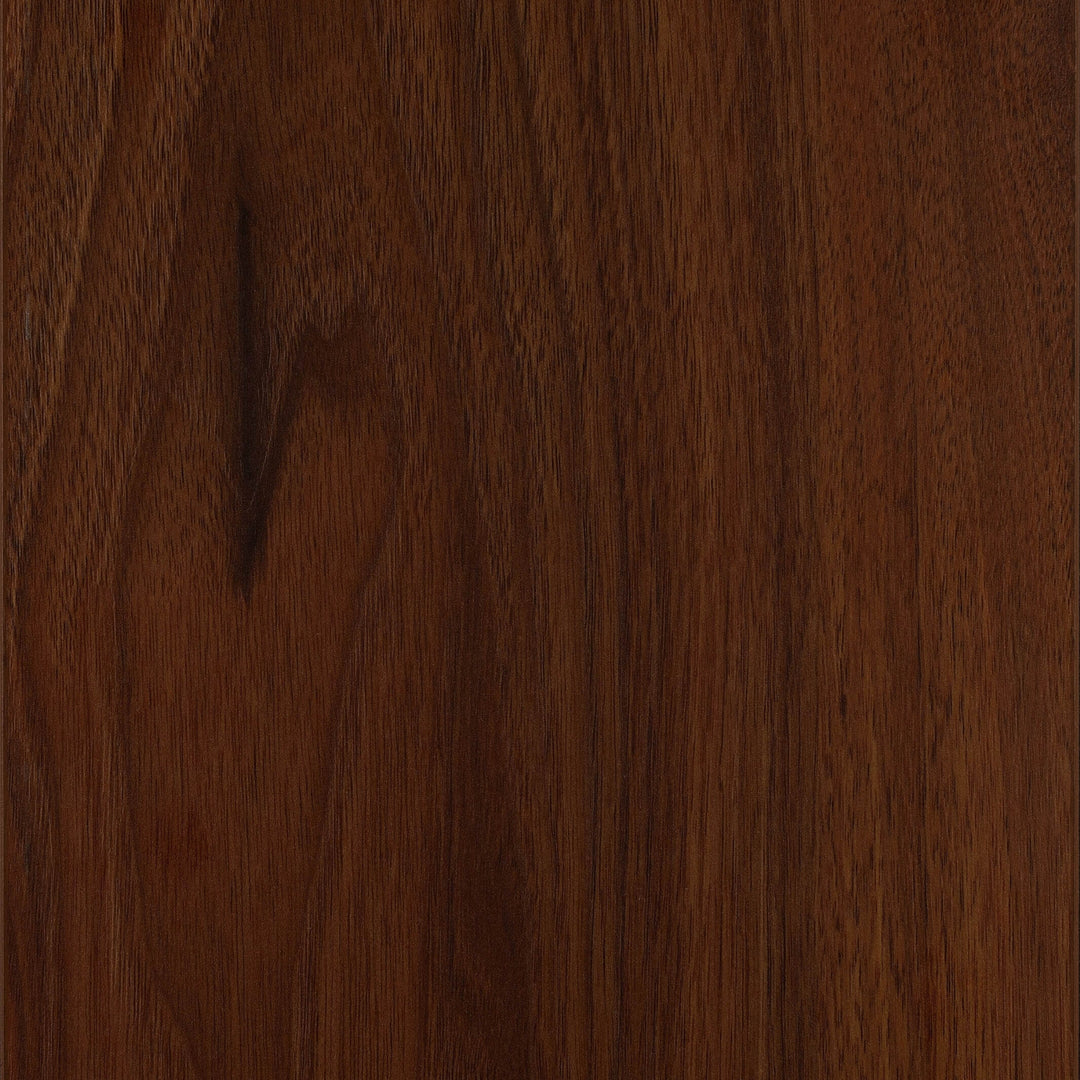
Waterproof laminate with real wood grain.
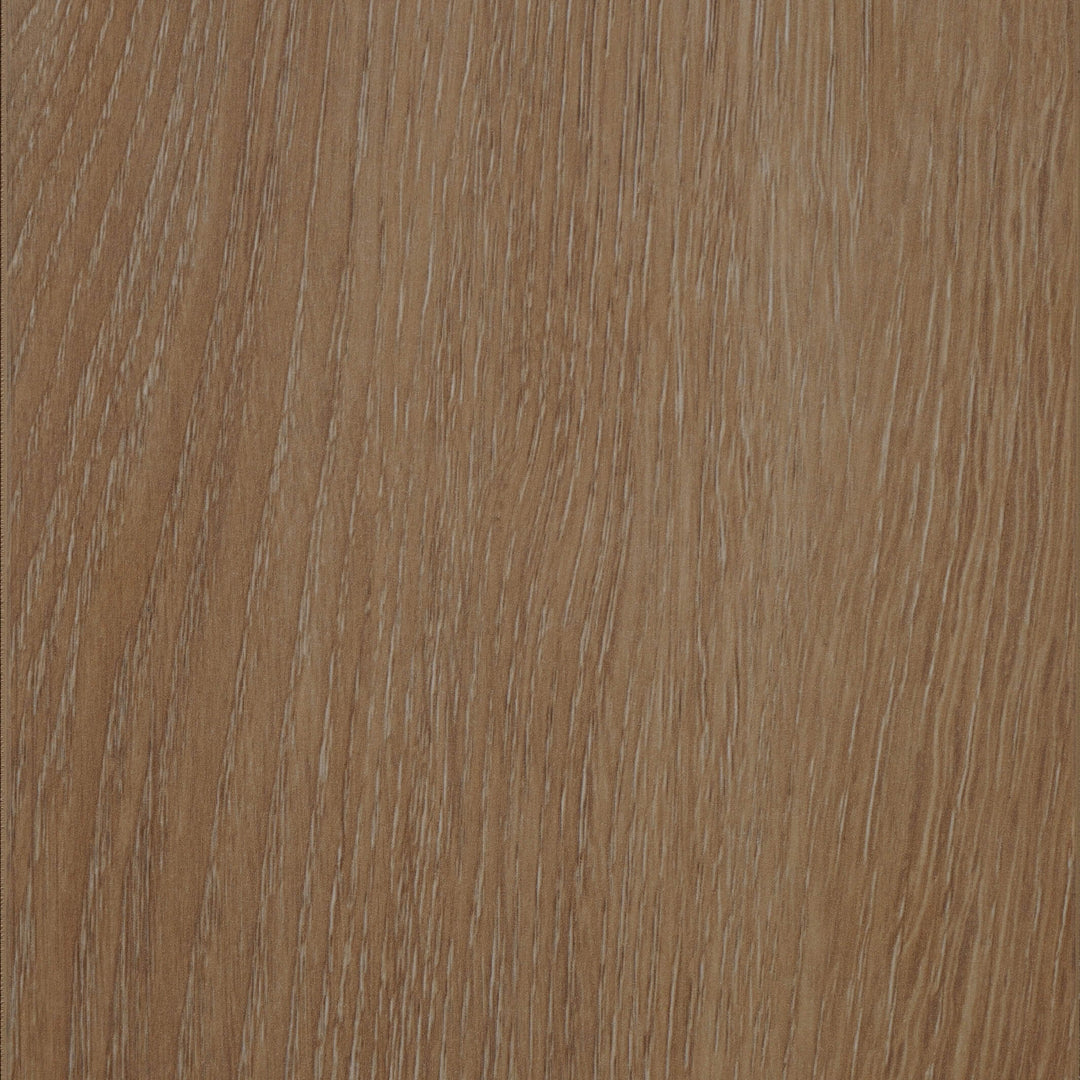
Waterproof laminate without breaking the bank.
Frequently Asked Questions
Floorbit's authorised installer can take care of the job for you so you can enjoy your new Waterblock Pro 12.6mm Herringbone flooring in no time. Most customers take about 1 to 2 days to install their flooring.
A professional installation assures your entitlement to Floorbit’s warranty service. Floorbit’s skilled flooring experts have the knowledge and experience to tackle even the most challenging installation scenarios, such as uneven subfloors or transitions to tiled or carpeted areas. Floorbit's authorised installers are well-versed in all aspects of the installation process and will make sure your flooring is installed correctly the first time, saving you time and potential headaches down the road.
If you encounter any issues during installation, please contact us via our Contact Page. Our customer service will be in touch shortly.
Learn more about flooring installation here.
Waterblock Pro 12.6mm Herringbone flooring is engineered for many years of daily use, but proper care and maintenance are still crucial to ensure they stay in good condition. For tips on keeping your flooring in pristine condition, we’ve put together a handy Care and Maintenance Guide with detailed maintenance instructions.
Multiply the length by the width of your room(s) to determine the estimated square footage (A). Add a 15% waste factor to your total square footage to account for cutting, installation errors and variation in floor design. Divide the total required square footage (B) by the number of square feet covered per carton of the floor you are installing.
Note: If you have an island in your room, you may want to deduct that area from your total square footage.
Measure the length of the island and multiply by the width. Deduct the total from the amount that you have in (A).
You’ll need to purchase one.
Divide your project’s total square footage (B) by the number of square feet in each roll/package of underlayment to find the total number of rolls/packages required.
When installing over concrete, you’ll need a vapour barrier.
Determine the perimeter of your room (C). Add the length and width together and multiply by two. Add the total widths of all doorways in the room. Subtract that from the perimeter (C) to determine the total length of skirting.
You’ll need to use a transition profile in doorways or when your new floating floor meets another surface.
Transition profile
Join two hard surface floors of equal height
Reducer
Transitions between two hard surface floors of different heights
Carpet transition profile
Finishes hard surface flooring where it meets carpet
End profile
Finishes a hard surface floor against sliding doors, and more
A stair nose is available in coordinating colours to complete each step. Determine the length of stair nose profile needed for the stairs in your home. Measure the width of each stair and multiply by the number of stairs to determine the total length of stair nose needed (D).
Stair nose
Provides a matching surface for the stair’s leading edge and covers the gap between the riser and the tread.
Waterblock Pro 12.6mm Herringbone is made of natural raw materials and is capable of withstanding chair castors and water. It is very durable. In normal conditions in private use, it should last around 15 years on average. Perfect for use throughout a home, from the kitchen to the bedroom, but also for commercial use.
By choosing Waterblock Pro 12.6mm Herringbone you are opting for a product of recognised quality. As pioneers in the field of laminate flooring in Malaysia, we have been steadily expanding and optimising our range of products since 2009. And our hunt for innovative solutions continues every day.
We place as much importance on the careful use of resources as we do on the appearance and quality of our products, by using only wood by-products from sustainable forestry operations.
Waterblock Pro 12.6mm Herringbone is not fixed to the subfloor but installed on top of it. This allows the wood material to have enough space to expand or contract depending on the temperature and humidity. Floating installation is a simple way of installing flooring. It is also easy to remove again.
If the gap doesn’t consistently have the right width (12mm), the Waterblock Pro 12.6mm Herringbone flooring may experience damage over time. Things that can happen include arching or warping of the flooring, cracks, peeling of the surface layer or breaking of the tongue-and-groove joints.
The warranty on your new flooring is void if you fail to include a gap of the right width (12mm) between it and all fixed objects.
For Waterblock Pro 12.6mm Herringbone, the maximum length without transition profiles is 10m. The expansion gap should be 12mm. In doorways, room transitions and if floors connect asymmetrically, you always need to install transition profiles.
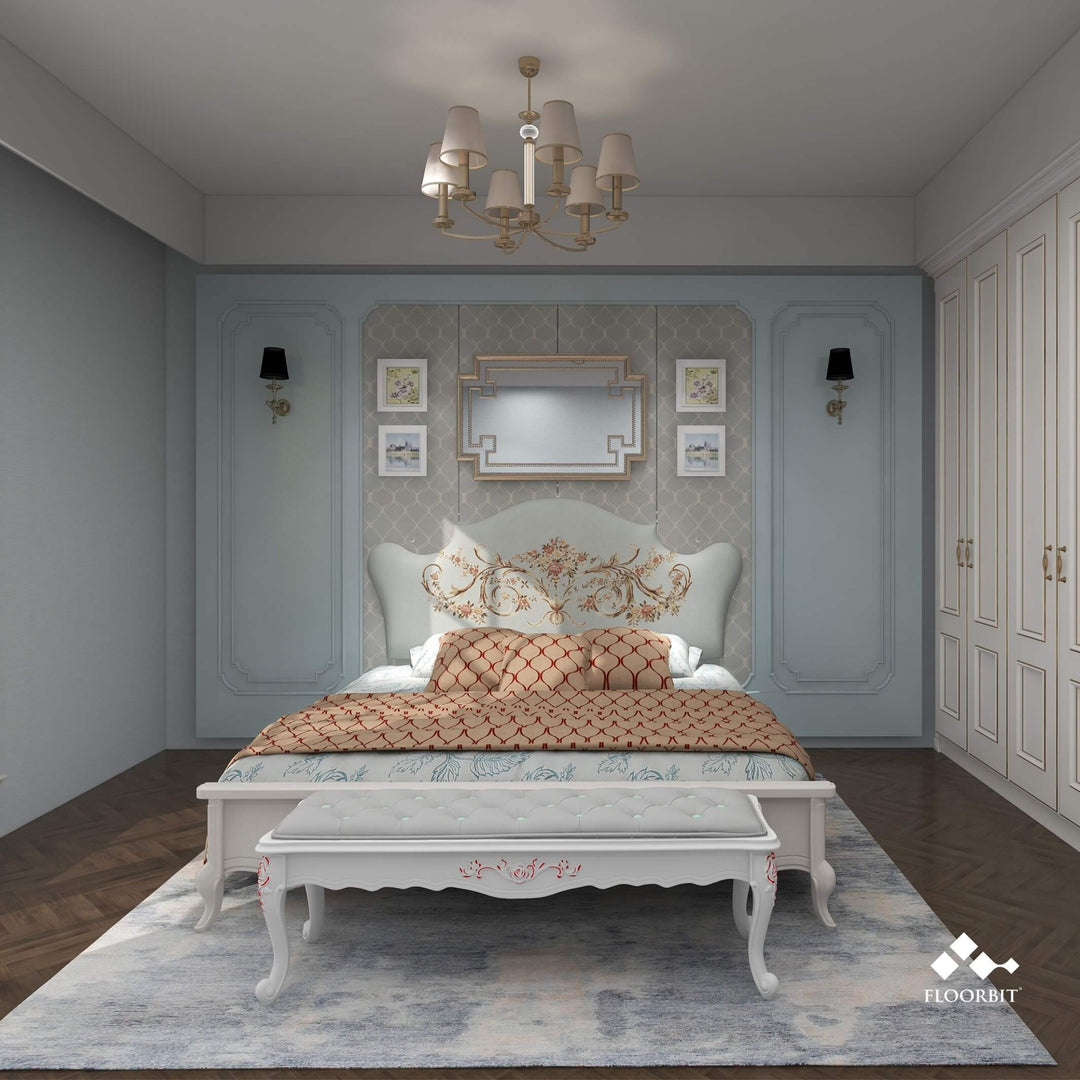
Waterblock Pro 12.6mm Herringbone is a durable and versatile flooring. It can withstand the heavy traffic of a living room, the non-stop action of a kids' room and even the occasional dropped spoons in the kitchen. The reinforced top wear layer protects against stains and dirt while offering resistance to moisture. This makes Waterblock Pro 12.6mm Herringbone an excellent choice for entryways and hallways that experience constant foot traffic. The wear layer also provides UV protection to prevent fading from prolonged exposure to sunlight, making it suitable for rooms with large windows. Waterblock Pro 12.6mm Herringbone flooring can be installed in any room inside the house where the floor is solid and flat. However, it should not be installed in rooms with sump pumps or floor drains and in motor homes, boats or planes.
With a few exceptions, such as carpet, Waterblock Pro 12.6mm Herringbone can be installed over almost any existing, structurally sound floor. Special considerations may be needed when installing it in a kitchen or bathroom to avoid any water-related issues. Contact us if you need help with installation in these areas.
Floorbit flooring is also often installed in commercial establishments, including hotels, restaurants, offices and shops. These floors naturally take more of a beating than in homes, so make sure you choose a product with an appropriate utilisation or abrasion class.
When installing Waterblock Pro 12.6mm Herringbone, it is important to leave a gap between the planks' edges and all walls. The gaps will be hidden by the skirting boards later.
The core material of Waterblock Pro 12.6mm Herringbone planks is Waterblock Pro HDF, to which decor paper is attached. HDF consists of up to 90% of wood fibres, and this renewable natural resource responds sensitively to changing environmental conditions such as heat, cold and moisture. It expands and contracts as a result of absorbing and releasing moisture. That is why the planks need a little extra room, or there is a risk that they will press against the walls and warp.
If your Waterblock Pro 12.6mm Herringbone flooring creaks or squeaks when you walk on it, the reasons may be as follows:
It can be straightforward to figure out how much flooring is needed to cover a floor, but occasionally it can also be tricky if a room has a complex geometry. We have a few tips to help you avoid buying too much flooring or, worse, not enough.
Ideally, you can use the floor plan of your property to calculate a given room’s area. But if this option isn’t available, you’ll have to get out the tape measure and do it by hand. It’s easiest when rooms are rectangular or square because you only need to measure the length and width and then multiply them. If you have a room with recessed corners, niches, bay windows, or similar features, separately measure each part and then add them up.
We recommend you buy 15% more than the calculated area to allow for scrap. These include sawn-off bits and pieces of planks that can’t be used anywhere else. And if you have unusual rooms with acute or obtuse angles, lots of doors, or heating pipes, get even more as you’re likely to need it.
Finally, it’s a good idea to keep any leftover planks and skirting boards after installation in case any repairs are required later.
Concrete floors or screeds need sufficient time to dry before you can start installing your Waterblock Pro 12.6mm Herringbone floor on top. As a rule of thumb, you should wait for one week per cm of screed (thickness) up to 4 cm. Wait twice as long for every additional cm (thickness) up to 6 cm and wait 4 weeks for every additional cm beyond 6 cm. Make sure the building is sufficiently ventilated.
Moisture migrates from the bottom to the surface, and this takes time. For new concrete subfloors, you should always lay a vapour barrier and an underlay on the concrete floor before installing Waterblock Pro 12.6mm Herringbone. Use Floorbit underlays to avoid problems later on.
Screed thickness
Advised drying time
<4 cm
1 week per cm
5 cm
6 weeks
6 cm
8 weeks
> 6 cm
+ 4 weeks per additional cm
For example, for a 6 cm thick concrete floor, you should count on at least (4 x 1 week) + (2 x 2 weeks) = 8 weeks of drying time. For concrete floors thicker than 6 cm, expect 4 weeks of drying time per additional cm.
Leave a 12mm gap between the flooring and the walls on all sides. The same applies to other solid objects such as doorframes, heating pipes and stoves that are flush with the floor and furniture. The gaps won’t be visible later because they will be covered by skirting boards or end profiles.
If the room is larger than 8 by 12 metres, you should include a transition profile in the middle.
You can use a handsaw with a mitre box. However, this requires a high expenditure of force, takes longer, and causes shavings.
If you are experienced in the use of a circular table saw, you can use one. Cutting is fast but loud and raises dust and shavings.
You can also use a jigsaw. However, it is advisable to be experienced in handling one. It can cut Waterblock Pro 12.6mm Herringbone quickly and flexibly.
Waterblock Pro 12.6mm Herringbone can best be cut with a laminate cutter. Such devices are easy to transport, and the flooring can be cut quietly without dust or shavings by employing a simple levering action.
If the installation is done correctly, you should have some space left between the floorboards and the wall. This will give the boards some leeway to shrink and expand when the humidity changes.
Install skirting boards or end profiles to cover the spaces between the wall and floor. You may glue or nail the skirting boards onto the wall. Then, use a silicon gun to spread some silicone on top of the skirting boards and even the silicone out using your finger.
How long laminate lasts depends on its utilisation or abrasion class, the wear and tear it is subjected to, and how well it is looked after. The German Tenants’ Association (Deutscher Mieterbund) states ten years as the life expectancy for laminate flooring.
It's always better to prevent humidity and moisture problems than to cure them afterwards. Despite the good moisture-resistant characteristics of Waterblock Pro 12.6mm Herringbone, we do not recommend installing them in damp rooms such as saunas and laundry areas.
Please observe the following instructions when using Waterblock Pro 12.6mm Herringbone flooring in high-humidity areas:
Following these instructions should ensure that your Waterblock Pro 12.6mm Herringbone flooring lasts a long time in high-humidity areas such as bathrooms and kitchens.
Humidity can make your Waterblock Pro 12.6mm Herringbone floorboards shrink or expand a bit. This fluctuation in humidity levels can cause them to become loose and move, resulting in openings between the boards. Fortunately, you don’t have to remove the entire floor to close these open joints.
Before you get started, you’ll need a few tools, a hammer, a chisel, a crowbar and a tapping block. Wood glue is optional.
Take a close look at the open joint to determine which direction the board moved. This is the side where you’ll remove the skirting board. Use the chisel and hammer to remove the skirting board on the side the floorboard moved towards. Once you’ve removed the skirting board, you’ll see which floorboard came undone. Using the hammer and tapping block, knock the board back in place to close the open juncture. You can use some wood glue in the crack between both boards to make sure it won’t come apart again.
Finally, glue the skirting board back together.
During humid periods, a rising floor may occur. That’s because humidity can expand or shrink the flooring. Your flooring will come up if they are too close to the wall.
You can fix a floor that rises in a few easy steps. You will need a chisel, a hammer and a multi-tool. Some surplus Waterblock Pro 12.6mm Herringbone board comes in handy too.
Take the extra board or a straight slat and put it over your floorboards to figure out which of the floorboards is elevated. If you’ve found the rising board, figure out which wall the board has moved towards as this will help to determine which skirting board to pry loose.
Remove the skirting board with the hammer and chisel. Put the chisel between the wall and board and knock on the top of the chisel with the hammer. Once the skirting board is removed, you’ll see which board is too close to the wall. Get out a pencil and a slat. Draw a sawing line onto the bulging board. The line should be drawn at the same height as the boards next to the misplaced board.
Use the multi-tool to saw along the line, and remove the piece of plank. Get rid of the sawdust with a vacuum cleaner. Check whether the floor is flat again. If so, you can put the skirting board back where it belongs.
Waterblock Pro 12.6mm Herringbone is made primarily from wood by-products, in other words, from natural raw materials. It is not plastic. It consists of a Waterblock Pro HDF core to which a layer of decor paper is applied. Waterblock Pro HDF consists of about 90% of wood fibres and 10% of environmentally-friendly bonding resin. Waterblock Pro 12.6mm Herringbone does not contain plasticisers, pesticides or other harmful additives.
Waterblock Pro 12.6mm Herringbone is manufactured without pesticides, organochlorine compounds and harmful heavy metals. The closed surface structure prevents the accumulation of dust or dirt. Dust mites and other allergy-causing microorganisms cannot survive on a clean Waterblock Pro 12.6mm Herringbone floor. This helps to protect your home from allergens which is important for people suffering from asthma or dust allergies.
Moreover, the sealed surface and finishing make Waterblock Pro 12.6mm Herringbone easy to clean. You can clean your floor with a damp (slightly moistened) mop to remove all dust, including fine dust.
There is no compulsory laying direction. However, we recommend the laying direction towards the light. If you have a window where sunlight enters the room, install your Waterblock Pro 12.6mm Herringbone floor in the direction perpendicular to the placement of the window. The long lines of the floor will then become parallel to the direction of the light entering the windows. It is easier for the eyes to move along the direction of sunlight and the long lines of your flooring simultaneously.
No. Although it may seem a good idea to install Waterblock Pro 12.6mm Herringbone over carpeting, there are a few reasons not to, regardless of whether it is high-pile, low-pile, Persian style or flokati:
Carpets become uneven as frequently used walking paths are pushed down by passing feet. High-pile carpeting is especially prone to this, but low-pile products also have a certain amount of play and can be permanently compressed. In these places, the flooring is likely to warp. This unevenness also stresses the joints of snap-together flooring, as they need to withstand greater forces than would be the case if the planks were level.
Dust and mites naturally accumulate in carpets, which normally isn’t a problem as they can be vacuumed. But after covering them with flooring, it is no longer possible to remove them. This can pose problems for someone with allergies because the flooring can trap moisture in the carpet, creating ideal conditions for mildew and mould.
It’s a mistaken belief that carpets can replace underlays to reduce impact sound. It is far better to use high-quality underlay specifically designed to work with Waterblock Pro 12.6mm Herringbone flooring.
Please check carefully whether your substrate is suitable for Waterblock Pro 12.6mm Herringbone or if you should pre-treat it to make sure that your floor can last for a long time. Damage caused by incorrect installation or unsuitable substrates is excluded from the warranty.
Yes, but with certain precautions. The concrete must be fully set. Moisture readings from a calcium chloride test (available at home centers) must be no more than 5 lbs/1000 sq ft/24 hours or less than 80% RH with an in situ probe. Should moisture record above these levels, Waterblock Pro 12.6mm Herringbone flooring is not recommended. In all cases, a 6 mil polyethylene moisture barrier sealed with at least 2” of waterproof OPP tape is required on all concrete installations.
Yes. The exact installation method depends on which type of subfloor you want to install the flooring on.
On a damp-porous floor covering
Remove any damp-porous floor covering such as carpet or needle felt before installing Waterblock Pro 12.6mm Herringbone.
On a damp-sealed floor covering
Damp-sealed floor covering such as PV, linoleum or VCT doesn't have to be removed, but a Floorbit underlay should be installed.
On a wooden subfloor
When you have a wooden subfloor, you don't have to remove the existing floor covering.
Important:
No signs of mould and insect infestation should be present. Make sure that the subfloor is level by nailing down any loose parts. The moisture content of the wood must not exceed 10%. Install the Floorbit underlay before installing the new floor at ninety degrees (perpendicular) to the existing subfloor.
Yes. Waterblock Pro 12.6mm Herringbone has a scratch and wear-resistant surface layer. It can be installed in the kitchen as a floating floor, not under kitchen furniture so that it can move.
Because of the moisture-resistant Waterblock Pro HDF coreboard, an accident such as a glass of water falling on the floor is not a problem. However, we recommend removing any standing moisture as soon as reasonably possible.
Naturally, Waterblock Pro 12.6mm Herringbone flooring in your kitchen will have to be cleaned more frequently than in other rooms of your house. However, there's no need to wash the floor because the sealed surface structure prevents dirt and dust from attaching. Usually, dry cleaning with a microfibre mop is sufficient. Occasionally, the floor can be cleaned with a damp or slightly moist microfibre mop.
Yes. However, the installation will require a Floorbit authorised installer, and Waterblock Pro 12.6mm Herringbone should not be installed in saunas.
Yes, you can. Make sure to install a suitable Floorbit underlay and a moisture barrier under the flooring, and provide sufficiently large expansion gaps (12mm) so that the installed floor can freely move under the skirting boards. Also, avoid standing water or other liquids on the floor, and put suitable doormats outside to collect dirt. Colour fading due to long-term sunlight exposure may occur.
You can easily cover your stairs with Waterblock Pro 12.6mm Herringbone using the Floorbit stairnose. The only condition is that the steps of your staircase must be straight. Staircase installation typically will take an additional day to finish.
Here's how it works:
Glue a cut-to-size Waterblock Pro 12.6mm Herringbone plank to the riser. Apply Floorbit Glue to the stairnose and the step. Spread out the Floorbit Glue across the stairnose. Place a plank on the step with the underside of the tongue against the edge of the front of the stairnose.
It is possible but not recommended as it will make the warranty void. However, in certain areas such as the staircase and bathroom, the flooring must be glued down with the assistance of a Floorbit authorised installer.
Yes. However, it’s recommended to take a few protective measures.
Use soft castors. Many office chairs can be ordered with soft or hard castors. Soft castors typically have an outside layer of different materials and colours (usually light grey). Soft castors will considerably extend the lifetime of your flooring. An additional benefit is that soft castors on a hard floor covering like Waterblock Pro 12.6mm Herringbone will increase sitting comfort.
Additionally, you can put a protective mat under your office chairs. Choose a mat for hard floor coverings without profiling on the back. Make sure that the size is big enough. In the case of intensive castor chair traffic, we recommend the combination of soft castors and protective mats.
Yes, you can install Waterblock Pro 12.6mm Herringbone on walls. You will need a substructure for attaching them, or the planks are glued directly onto the wall.
However, if you install Waterblock Pro 12.6mm Herringbone on walls, you are not using it for its intended purpose. This will invalidate any guarantee or warranty.