

Service Information
A professional installation assures your entitlement to Floorbit’s warranty service. Floorbit’s skilled flooring experts have the knowledge and experience to tackle even the most challenging installation scenarios, such as uneven subfloors or transitions to tiled or carpeted areas. Floorbit's authorised installers are well-versed in all aspects of the installation process and will make sure your flooring is installed correctly the first time, saving you time and potential headaches down the road.
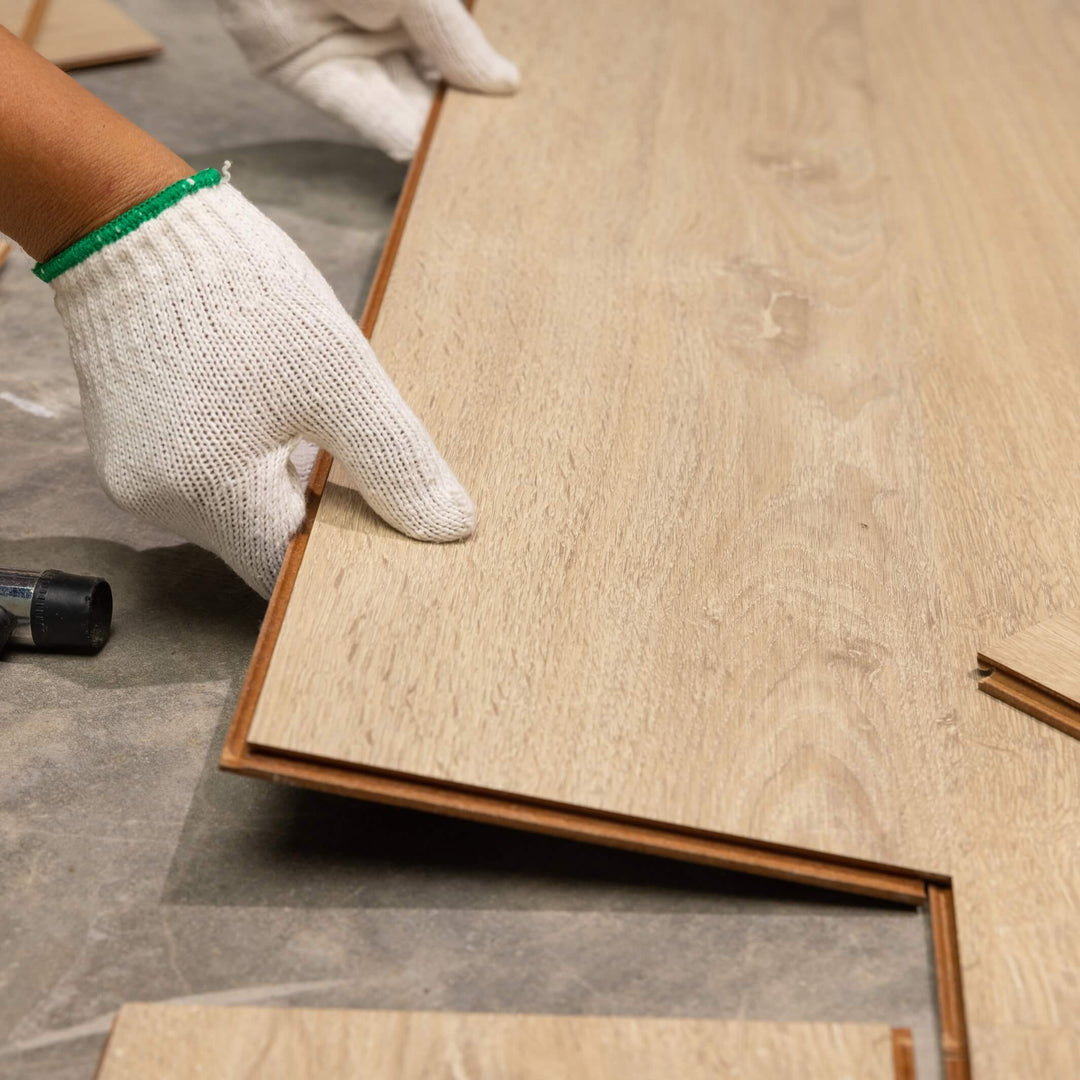
All Floorbit flooring products can be installed using the floating method, which eliminates the need for glueing or screwing down the boards. Instead, the individual floorboards are connected using Floorbit’s click systems, allowing the flooring to rest on the subfloor without a permanent bond. This enables the flooring to move freely. The floating installation method, combined with Floorbit's click systems, makes the installation process simple, quick, and flexible.
Before any work begins, measure your room accurately to determine the amount of flooring required. Floorbit offers a professional measurement service and can provide expert advice on how to calculate your flooring estimate. During the installation process, the room(s) being worked on should be off-limits to you and your family to ensure a safe and efficient installation. While Floorbit strives to complete the project within the estimated timeframe, unforeseen issues may arise, potentially extending the installation by a few days.
Preparing for installation:
- Set aside time to move furniture out of the installation room. Consider hiring Floorbit or another third party to assist with moving heavy appliances or electrical devices that require disconnection and reconnection.
- Unlike most flooring, Floorbit products can be installed over most pre-existing surfaces. However, in some cases, the old flooring may need to be removed to accommodate doors and transitions between rooms. Always remove any carpet before installation.
- Remove skirting boards prior to installing the new flooring.
During installation:
- Installing Floorbit flooring involves the use of various hand and power tools. The process can be noisy and disruptive due to cutting and trimming. To minimise mess, the saw is often set up outside, but you should still expect a small amount of dust to collect during installation.
After installation:
- Once the installation is complete, it's best to stay off the newly installed floor for a period of time to allow adhesives used, if any, to set properly.
- When moving furniture back into the room, consider adding felt or rubber pads to the bottom of any pieces that will come in direct contact with the new floors. This helps to minimise scratches and dents.
- Test any appliances that were moved during the installation to ensure there are no leaks or electrical issues.
Please note that Floorbit's Limited Warranties are subject to the condition that floors must be installed by Floorbit authorised installers. If you need additional information, please contact our customer service at 012-851 1678 or visit www.floorbit.com.
Floorbit will send out an experienced estimator to measure your rooms and calculate the amount of flooring required. Floorbit will also provide or recommend an authorised professional installer who has the expertise to install your new flooring.
Before installation:
- Speak with your installer prior to the installation date to clarify their responsibilities and set a schedule for the work.
- Most installers will move your furniture as part of their service. However, you should move any small items or breakables before the installer arrives.
- For larger items or appliances, check with your installer first. They can advise you on what to expect and whether you need to arrange for a third party to move and rewire these items.
- Your main goal is to move any items that could get damaged during the installation while making your installer's job as easy as possible. This will help speed up the installation process.
During installation:
- Once work begins, your installer will be responsible for preparing your floor for the new installation. This may involve removing the old flooring or patching and sanding the existing floor to eliminate any dips or bumps and ensure the subfloor is level.
- Most installers will remove and dispose of your old flooring. However, it's always a good idea to confirm this before they begin.
- During floor preparation, the installer will also remove any flooring accessories in the room.
- It's important for you to be home during the installation to make any last-minute decisions if issues arise. However, make sure to observe from a distance to avoid interfering with the installer's work.
- Make sure that the conditions in the room and the properties of the flooring are a good match, such as stresses and moisture.
- Calculate how much flooring you will need to buy, and don’t forget matching skirting boards.
- Make sure the subfloor is suitable. It should be level, dry, solid, and clean. Level out any unevenness.
- Make sure there is enough space between the surface of the installed flooring and doors so they can be closed, taking into account the underlay. If necessary, shave material off the undersides of the doors. However, never undercut metal door frames.
- Lay a suitable vapour barrier and underlay for reducing impact sound.
- When installing the flooring, leave 12mm gaps (8mm for Floorbit 5mm) at the walls, especially in large rooms. With lengths of more than 10m and widths of more than 10m, there should be an intermediate expansion profile. The swelling and shrinking are linear, so the bigger the surface, the bigger the play at the edge has to be.
- Use transition and compensation profiles where different floors meet.
- Install appropriate skirting boards if needed. Please attach them only to the wall, not to the flooring.